*Note: I did not verify that statement!
There are many articles about optimizing the ConfigMgr database. There are separate articles about backing it up. Other articles about other things to backup. So, let’s put them all together and create a maintenance plan that does it all.
The goal is to clean WSUS, run integrity checks on the databases, optimize indexes on the databases, copy the CD.Latest folder, and backup the databases.
Using ConfigMgr built in maintenance plan
In the Administration node of ConfigMgr click on Sites > Site Maintenance. You will see a list of all the build in ConfigMgr maintenance tasks. Here is a reference: https://docs.microsoft.com/en-us/sccm/core/servers/manage/reference-for-maintenance-tasks
Select Backup Site server and provide a location for the backup and a schedule. Done. Not really!
Though this is the easiest way to backup ConfigMgr, it isn’t very efficient. The Backup Maintenance Task also backs up specific registry keys (which will be ignored during a restore), specific folders (which will also be ignored during a restore), and the CD.Latest folder.
You can create a file called AfterBackup.bat that will execute when the Backup Maintenance Task is complete. https://docs.microsoft.com/en-us/sccm/protect/understand/backup-and-recovery
This backup plan does not optimize the database. There is a ConfigMgr maintenance task called Rebuild Indexes that is meant to optimize the database, but doesn’t work that well and isn’t customizable.
Plus, we can’t run any other SQL maintenance tasks.
I would say that this solution isn’t really for the cool kids.
Using the SQL Server Maintenance Plan Wizard
Before we start creating our maintenance plan there are several things that need to be done first. Key word – SEVERAL!
Optimizing the ConfigMgr Database
Steve Thompson [MVP] wrote a great article on how to use Ola Hallengren’s Maintenance Solution script. https://stevethompsonmvp.wordpress.com/2016/11/29/optimizing-sccm-databases-revisited/
No need to rewrite his article, but I will add a bit more information.
Why does he create the CMMonitor database? When you run the Maintenance Solution script a table will be created that logs the results of the various SQL Server Agent Jobs. Creating this database isn’t a requirement, but is a very good recommendation. Ola’s scripts want to write to some table. If you don’t create the CMMonitor database the scripts will write to a table in the Master database. That is poor practice in my opinion. We shouldn’t be writing to the system databases.
I’m going to call my database SQLMaint since this solution is for the entire SQL server and not just ConfigMgr.
Ola’s scripts are here: https://ola.hallengren.com/sql-server-index-and-statistics-maintenance.html Keep in mind that they are updated every now and then.
In Steve’s post he downloads the entire maintenance solution. You can also download the individual scripts as well.
I’ll highlight some options in the entire script:
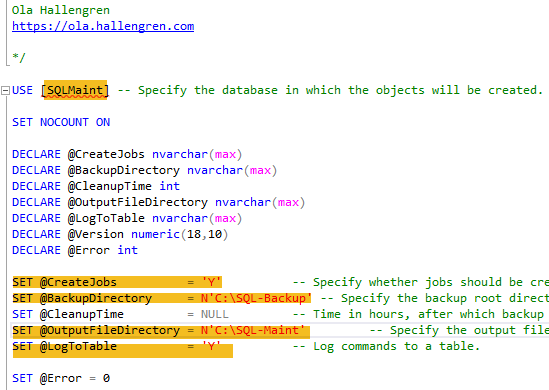
The top highlight is the database where the logging table will be placed
The @CreateJobs variable tells the script to create all the SQL Server Agent Jobs or skip them.
The @BackupDirectory variable tells the script where to place the backups
The @OutputFileDirecotry variable specifies where the logs will be written. If you don’t specify this, the logs will be written to the same location as the SQL Server logs
The @LogToTabel variable specifies whether the script will write the results of the jobs to the table in the database you specified.
If you run the entire Maintenance Solution script with @CreateJobs = ‘Y’ you will get a TON of SQL Server Agent jobs that you probably will never use.
Here are the SQL Server Agent Jobs that are created. I would suggest that the highlighted jobs are the only ones you need.
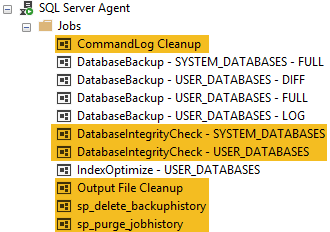
As Steve Thompson mentions in his post, every time you update the Maintenance Solution you can set @CreateJobs = ‘N’
I would rename the above highlighted jobs to “Maintenance Plan – [job name]”. Naming conventions are important.
Also, in Steve’s post he mentions how to create the IndexOptimize job. You will want to look at the dbo.CommandLog table that gets created in the SQLMaint (or CMMonitor) database to fine tune the job.
Steve’s example:
EXECUTE dbo.IndexOptimize
@Databases = ‘– USER_DATABASES’,
@FragmentationLow = NULL,
@FragmentationMedium = ‘INDEX_REORGANIZE,INDEX_REBUILD_ONLINE,INDEX_REBUILD_OFFLINE’,
@FragmentationHigh = ‘INDEX_REBUILD_ONLINE,INDEX_REBUILD_OFFLINE’,
@FragmentationLevel1 = 10,
@FragmentationLevel2 = 40,
@UpdateStatistics = ‘ALL’,
@OnlyModifiedStatistics = ‘Y’,
–@MaxDOP=2,
–@SortInTempdb = ‘Y’,
@LogToTable = ‘Y’
A colleague of mine has fined tuned his IndexOptimize job to look like this:
EXECUTE dbo.IndexOptimize
@Databases = ‘– USER_DATABASES’,
@FragmentationLow = NULL,
@FragmentationMedium =’INDEX_REORGANIZE,INDEX_REBUILD_ONLINE,INDEX_REBUILD_OFFLINE’,
@FragmentationHigh =’INDEX_REBUILD_ONLINE,INDEX_REBUILD_OFFLINE’,
@FragmentationLevel2 = 25,
@PageCountLevel = 100,
@WaitAtLowPriorityMaxDuration = 15,
@WaitAtLowPriorityAbortAfterWait = ‘SELF’,
@UpdateStatistics = ‘ALL’,
@OnlyModifiedStatistics = ‘Y’,
@LogToTable = ‘Y’,
@Indexes = N’ALL_INDEXES’
@Execute = ‘Y’;
Your results may be different. Monitoring SQL Server performance and fine tuning the IndexOptimize job is beyond the scope of this article.
Backup options for SQL Server Always On Availability Group
If you have your ConfigMgr environment using SQL Server Always On, there are a few different steps that must be taken. The above will work for all of the other databases.
With Always On the database is in FULL recovery mode. That means that you will need to take log file backups quite frequently or risk the log file getting out of control in size.
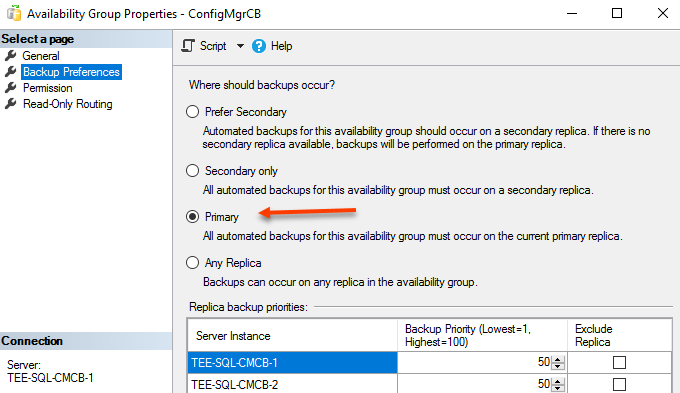
I set my Availability Group to back up from the Primary. You can choose whatever works best for you.
Creating a backup job for the MSSQL System Resource Files
https://msdn.microsoft.com/en-us/library/ms190940.aspx
Create a new SQL Server Agent Job. Make sure SA is the owner
- Name = SQL Backup – MSSQLSystemResourceFiles
-
Job step – T-SQL =
— USE master;
EXEC xp_cmdshell ‘COPY “C:\Program Files\Microsoft SQL Server\MSSQL14.MSSQLSERVER\MSSQL\Binn\mssqlsystemresource.mdf” C:\SQL-Backup’;
GO
— USE master;
EXEC xp_cmdshell ‘COPY “C:\Program Files\Microsoft SQL Server\MSSQL14.MSSQLSERVER\MSSQL\Binn\mssqlsystemresource.ldf” C:\SQL-Backup’;
GO
NOTE: You may need to enable xp_cmdshell on your SQL Server. https://docs.microsoft.com/en-us/sql/database-engine/configure-windows/xp-cmdshell-server-configuration-option
Backup cd.Latest folder using SQL Agent Job
Kent Agerlund [MVP] wrote a great article describing various ways to backup ConfigMgr. In his article he describes how to create a SQL Server Agent job that copies and compresses the cd.Latest folder. Run through the steps he outlines to create the job. http://blog.ctglobalservices.com/configuration-manager-sccm/kea/configuring-backup-in-configmgr-current-branch/
Here is the example Operating system (CmdExec) command I use: powershell.exe -command “Add-Type -Assembly ‘System.IO.Compression.FileSystem’ -PassThru | Select -First 1 | % { [IO.Compression.ZIPFile]::CreateFromDirectory(‘\\Tee-cmcb-1\c$\Program Files\Microsoft Configuration Manager\cd.latest’, ‘C:\SQL-Backup\ConfigMgrCDLatest’ + (Get-Date -format ‘yyyyMMddHHmm’) + ‘.zip’) }”
WSUS Cleanup
We are making an all in one maintenance and backup solution for ConfigMgr. Better cleanup the WSUS database as well!
Create a new SQL Server Agent Job called “WSUS – DB Cleanup”. Make sure SA is the owner.
Add a new PowerShell step with the following command: Get-WsusServer | Invoke-WsusServerCleanup –CleanupObsoleteUpdates -CleanupUnneededContentFiles -CompressUpdates -DeclineExpiredUpdates -DeclineSupersededUpdates
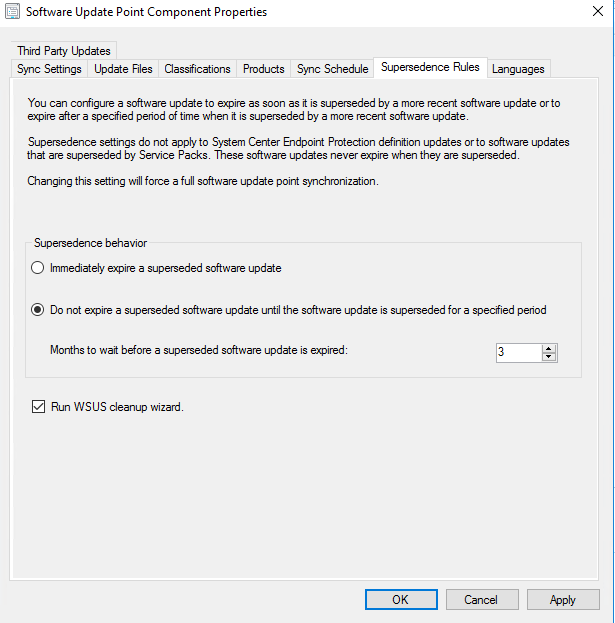
NOTE: You can set the time period for declining superseded updates in the ConfigMgr console
Create a Maintenance Plan using SQL Maintenance Plan wizard
One way to create an all in one SQL maintenance solution is to use the Maintenance Plan wizard. The other is using SSDT and creating an SSIS job. That is covered in the next topic.
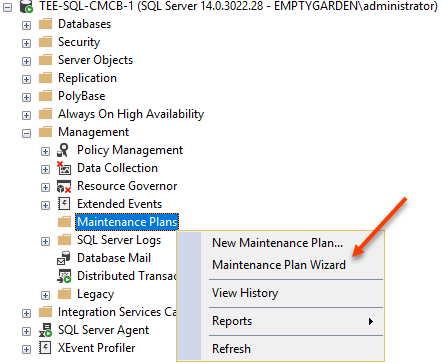
Open SSMS > connect to the SQL server that is hosting the ConfigMgr database > expand Management > Right click Maintenance Plans and select Maintenance Plan Wizard
Give the Maintenance Plan a name and select next.
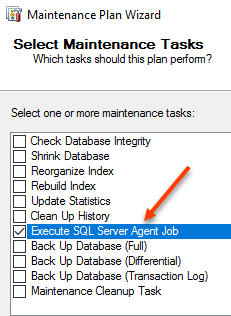
Select Execute SQL Server Agent Job and Maintenance Cleanup Task. Select next twice.
Let’s start with the ‘Maintenance Plan -CommandLog Cleanup’ job. This is part of Ola’s script. See the link above if you need more information on the job Ola’s script creates.
Select next.
Select where you want the Maintenance Plan Report to go or be sent to.
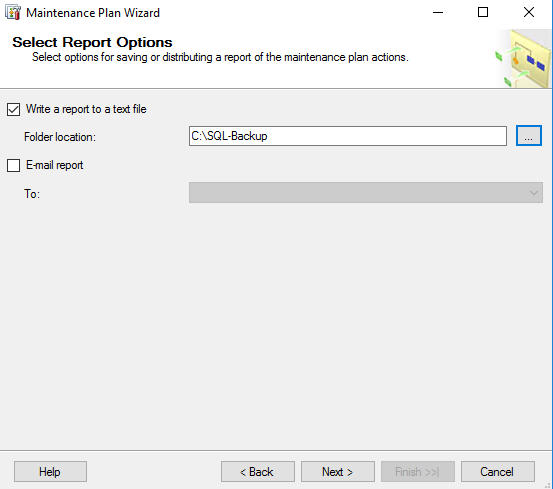
Select Next and Finish
We are not even close to being done. Just so you know!
Now the Maintenance Plan needs to be modified to include the rest of tasks you want to run.
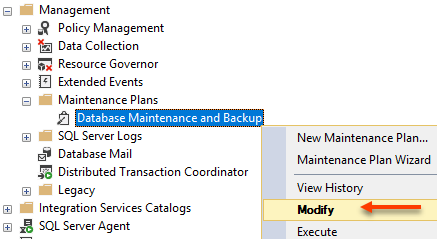
Find your Maintenance Plan > right click > select Modify
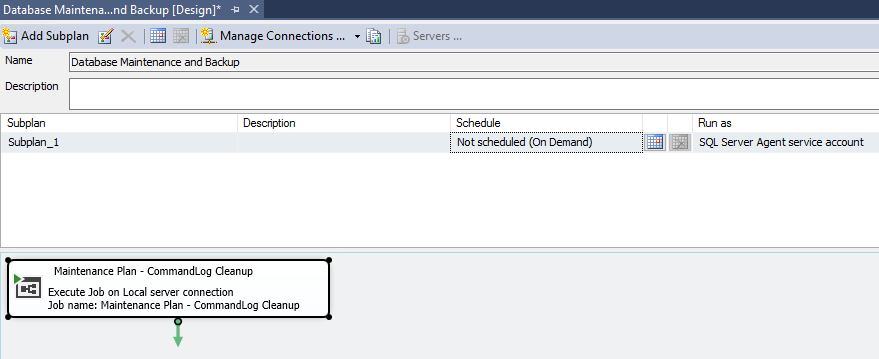
The maintenance plan should look something like this:
On the upper left side of SSMS you will see a Toolbox. Expand it and pin it
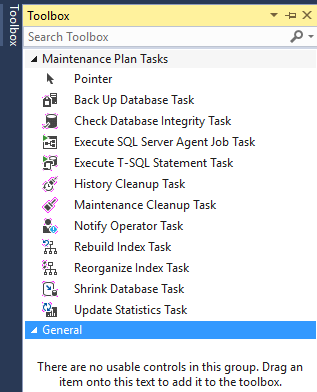
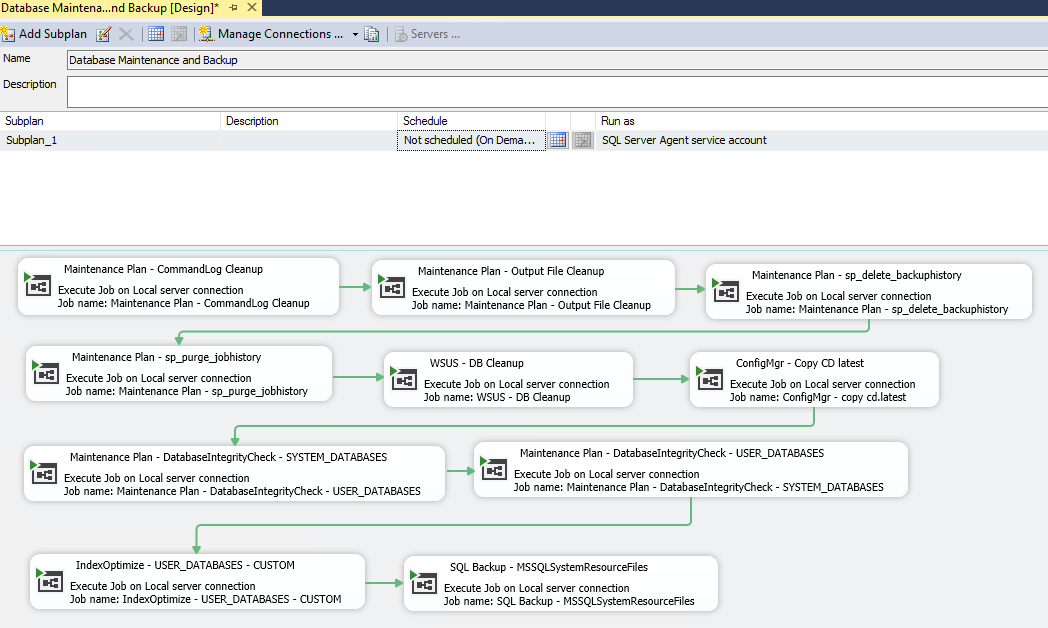
Double click the Execute SQL Server Agent Job Task. The task will appear into the Maintenance Plan designer. Do that for each of the following in this order. Each SQL Server Agent Job Task will correspond with the list below. Connect the green link from the previous step to the new step each time you add one.
- Maintenance Plan – CommandLog Cleanup
- Maintenance Plan – Output File Cleanup
- Maintenance Plan – Sp_delete_backuphistory
- Maintenance Plan – sp_purge_jobhistory
- WSUS – Cleanup DB
- ConfigMgr – Copy CD.latest
- Maintenance Plan – DatabaseIntegrityCheck – SYSTEM_DATABASES
- Maintenance Plan – DatabaseIntegrityCheck – — USER_DATABASES
- IndexOptimize – — USER_DATABASES – Custom
-
SQL Backup – MSSQLSystemResourceFiles
At this point the Maintenance Plan should look like this:
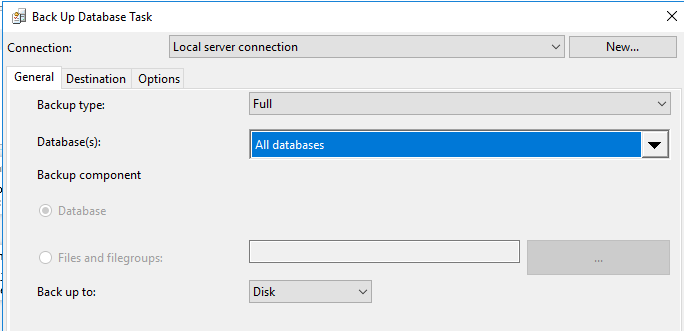
Now it is time to add the backup task. Double click the Back Up Database Task.
In the design window double click the Back Up Database Task to set the options.
Select All Databases
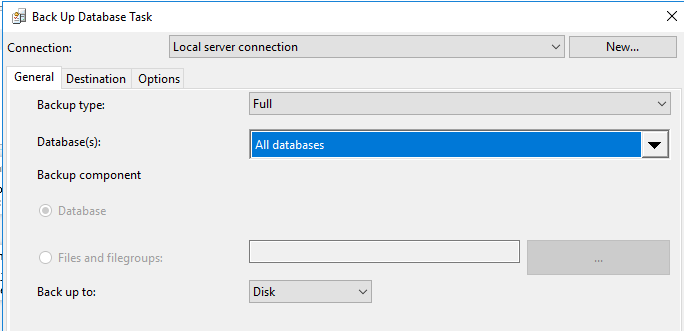
As referenced before, if you have an Always On Availability Group, it needs to be set to prefer the Primary Only for backups. This particular task does not support secondary’s as you can see below. If you want or need to backup the secondary replica, you will need to create a SQL Server Agent job to do it.
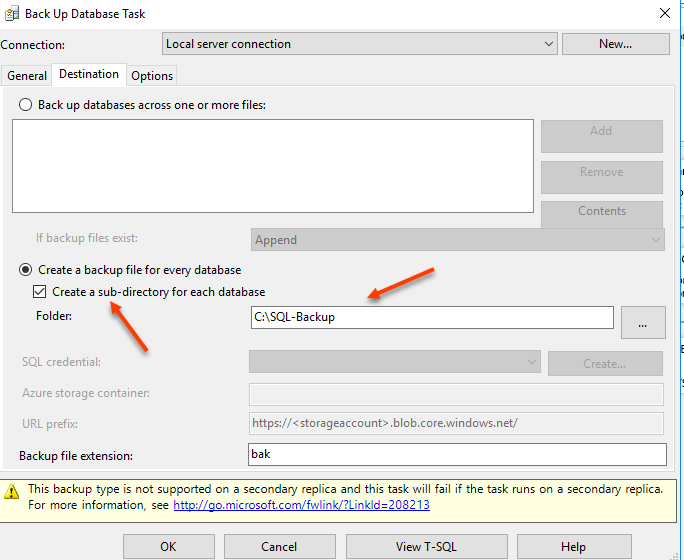
Select the Destination tab and configure to your needs.
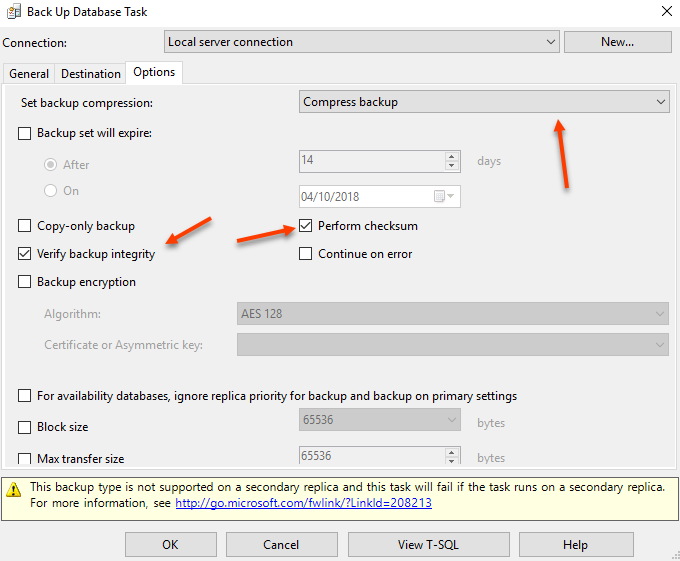
Select the options tab and configure to your needs. I would recommend using compression, verifying the backup, and checksum.
When finished your Maintenance Plan will look something like this:
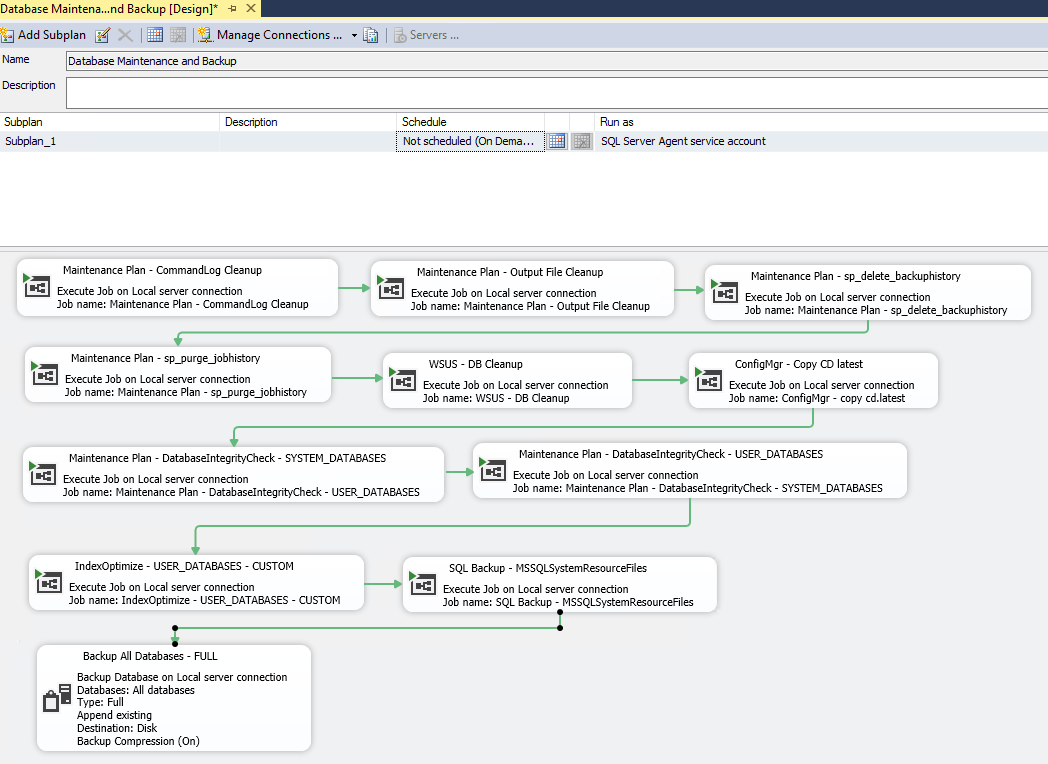
The next step is to schedule the plan. You will notice in the Subplan_1 section above that there is a schedule.
NOTE: If you are running ConfigMgr with SQL Always On Availability Group you will want to back up the log quite frequently. You can schedule the SQL Server Agent job that backs up the log file separately from the Maintenance Plan.
Exporting and Importing the Maintenance Plan
When exporting a Maintenance Plan the connection manager (data source) gets exported with it.
Example: Modify the Maintenance Plan
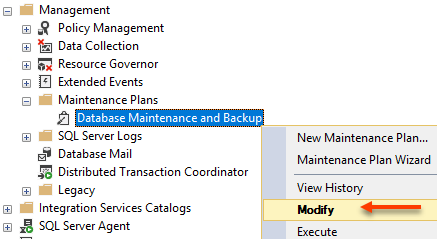
Click on Manage Connections
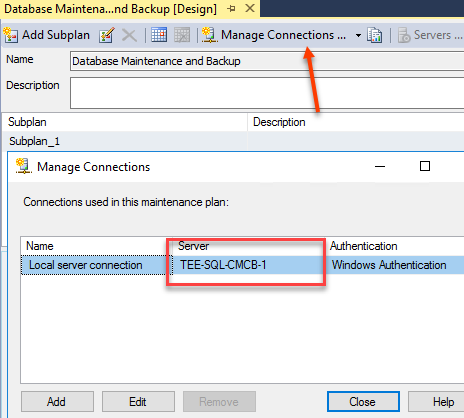
Notice that the Local server connection is set to the same server you created the Maintenance Plan on. You can’t change this setting. Go ahead and click edit and try it out since I know you want to!
Exporting a Maintenance Plan
When exporting the plan the connection will be exported with it. Which, will present problems when importing the plan into a different SQL Server.
To export a Maintenance Plan you will need to connect to the SSIS instance of the SQL Server
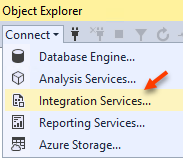
Once connected click on Stored Packages > MSDB > Maintenance Plans
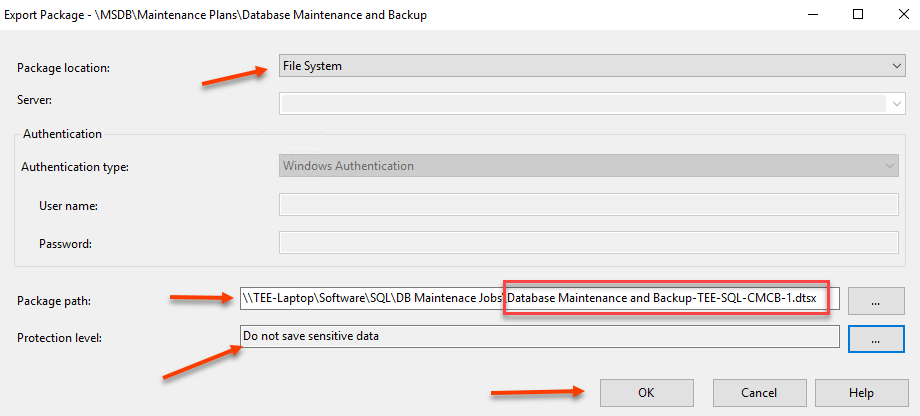
Right click the Database Maintenance and Backup object and select Export Package
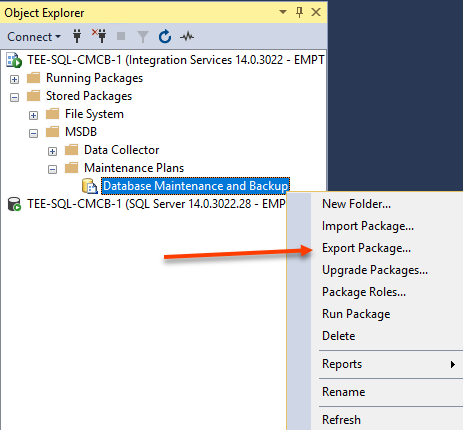
Since we have already determined that the data source in the package can’t be changed, it would be wise to name the exported package with the name of the SQL Server
There is no need to save any sensitive data.
Importing a Maintenance Plan
I totally didn’t spend hours trying to find resources on the internet regarding changing the connection manager (data source) of a Maintenance Plan. Apparently I am the only person on Earth who would do such a thing! Thus, I had to figure it out myself. You are welcome.
You will need SSTD to accomplish this. https://docs.microsoft.com/en-us/sql/ssdt/download-sql-server-data-tools-ssdt
Open SSDT
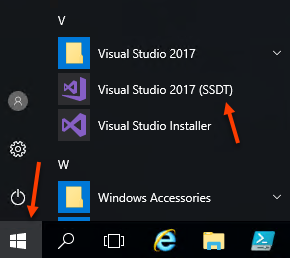
Select File > Open > File

Navigate to the DTSX file you saved earlier.
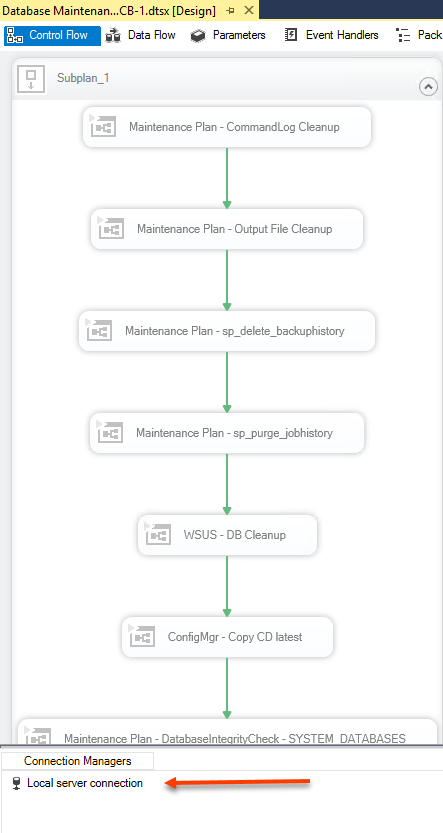
Double click Connection Managers in the lower portion of the window
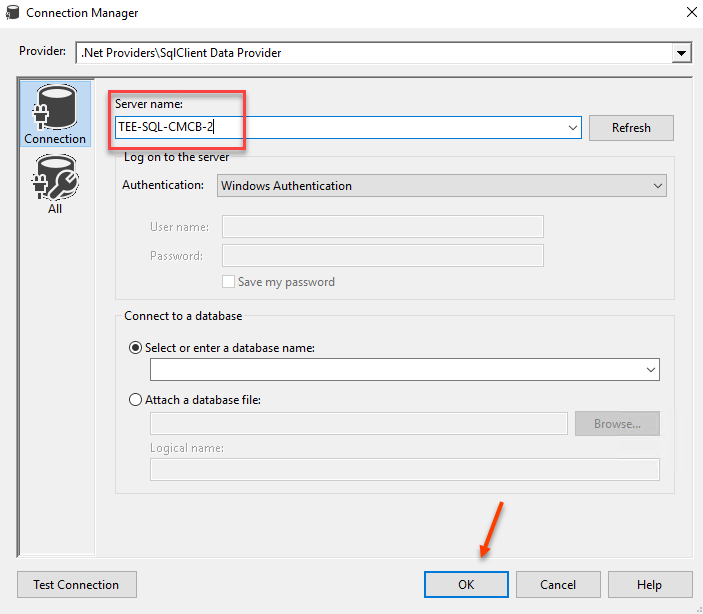
Change the Server name to the SQL Server you want to import the Maintenance Plan to and click OK
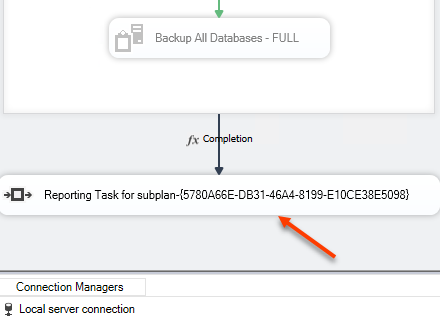
Delete the ‘Reporting Task for suplan…..’ step
Select File > Save as and provide a new name for the DTSX file.
We are now ready to import. Back in SQL Server connect to SSIS
To import, connect to the SSIS instance of the SQL Server you want to import the Maintenance Plan to
Once connected click on Stored Packages > MSDB
Right click Maintenance Plans and select Import Package
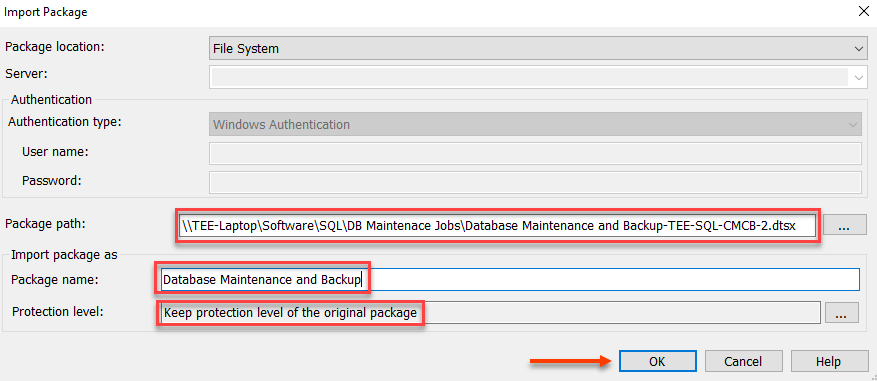
If you modify the newly imported Maintenance Plan you will notice the Manage Connection (data source) is now pointed to the new server
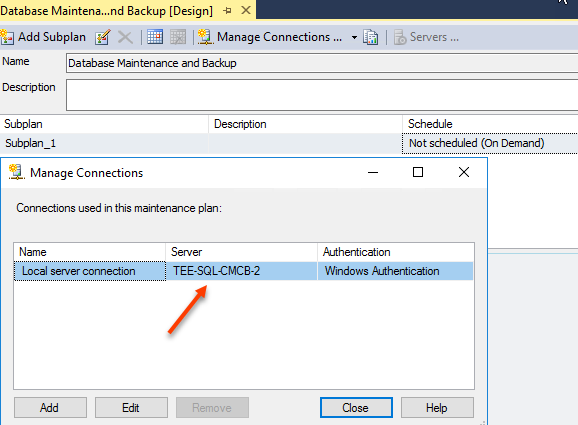
You will need to open and close the newly imported Maintenance Plan in order for it to register with SQL Server. Once you close the open plan you will be prompted to save it.
Once the plan is saved you will see that a new SQL Server Agent Job has been created. The plan will NOT run until you open / close / save it.
You will want to set up a new schedule for the Maintenance Plan.
Keep in mind that nothing will run unless you also export and import the SQL Server Agent Jobs the Maintenance Plan references.
